
ai image to video is the process of using AI to transform a single image (or a small set of images) into a short video...
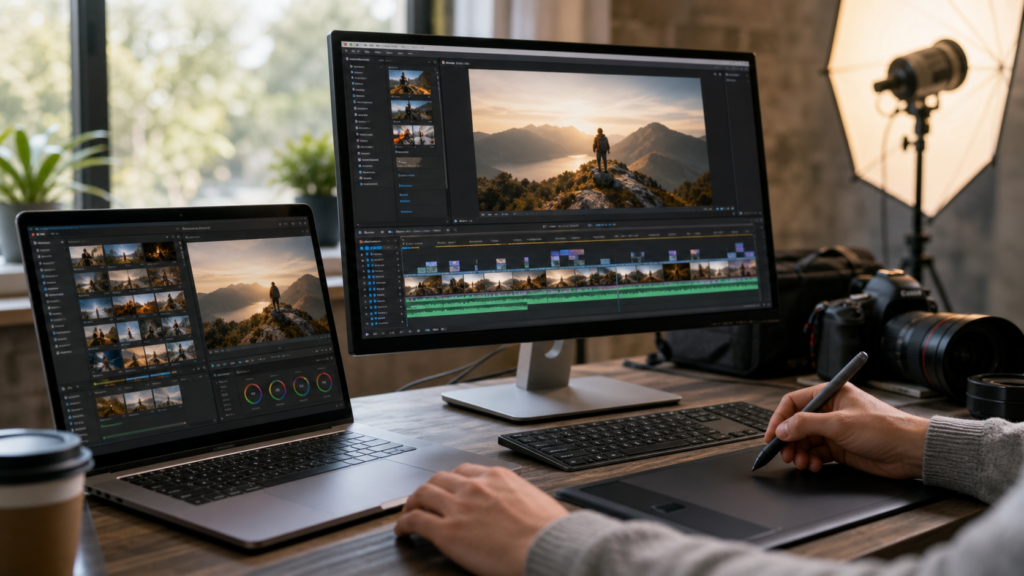
ai image to video is the process of using AI to transform a single image (or a small set of images) into a short video by generating realistic motion, camera movement, and scene changes while trying to preserve the original subject and style.
This technology is growing fast because it solves a real content problem: people want motion for social media, ads, product showcases, and storytelling—but they don’t always have footage, time, or budget for full video production. With the right workflow, you can turn a product photo into a rotating hero shot, animate a portrait with subtle movement, or bring concept art to life in seconds.
At the same time, image-to-video isn’t “one click and perfect.” Results depend heavily on your source image quality, how you describe motion, and whether you understand common failure points like flicker, warped faces, and unnatural physics. This guide walks you through how it works, how to get better outputs, and how to use it responsibly.
What “AI Image to Video” Actually Does
Traditional video is captured frame by frame with a camera. AI image-to-video generates those frames for you. It takes your still image as a starting frame, then predicts what the next frames should look like based on learned patterns of movement, lighting, depth, and camera behavior.
Most tools combine a few ideas:
- Motion generation: creating changes between frames (hair moving, fabric shifting, waves flowing).
- Camera movement simulation: panning, zooming, dolly-in, orbit, parallax.
- Scene stability: keeping key identity features consistent so the video doesn’t “melt.”
- Temporal coherence: making frame-to-frame transitions smooth rather than jittery.
The output is typically a short clip (often 2–10 seconds). Longer clips are possible, but consistency becomes harder as duration increases.
Why People Use AI Image to Video (High-Value Use Cases)
Image-to-video is popular because it fits modern content formats: short, visual, and fast to produce.
Social media and short-form content
- Turn a single image into a looping clip for Reels/Shorts/TikTok
- Add gentle motion to stop the scroll
- Create multiple variations quickly for A/B testing
Product marketing and eCommerce
- Animate a hero product image with a slow orbit or push-in
- Add motion to packaging, textures, and lighting
- Create “video-like” assets when you only have photos
Creative storytelling
- Bring illustrations and concept art to life
- Create mood shots and atmospheric motion (fog, rain, neon flicker)
- Build quick visual sequences for pitches and trailers
Training and presentations
- Make slide visuals feel more dynamic
- Create short scene transitions for explainers
Music visuals and background loops
- Generate abstract motion loops based on a cover image or artwork
- Create animated backdrops for livestreams (with careful rights handling)
How AI Image to Video Tools Differ (And Why It Matters)
Not all tools behave the same. Before choosing a workflow, it helps to know what category you’re using.
1) “Camera move” animators (parallax-style)
These focus on depth and camera motion. They’re great for:
- Landscapes
- Architecture
- Product stills with clear edges
They may struggle with:
- Complex limbs
- Fast action
- Big changes to the subject
2) Generative motion tools (scene synthesis)
These try to generate new motion within the scene: facial expression changes, cloth movement, smoke, water, and so on.
They’re great for:
- Cinematic effects
- Natural atmosphere
- Stylized motion
They can struggle with:
- Identity consistency (faces changing)
- Fine detail stability (text on packaging, jewelry, logos)
3) Character/portrait-focused animators
These focus on faces and talking-head-style motion.
They’re great for:
- Subtle portrait animation
- Eye movement, head tilt, expression shifts
They can struggle with:
- Hands
- Full-body motion
- Fast camera moves
For best results, match the tool type to the clip you want.
Start With the Right Source Image (This Drives Everything)
The easiest way to improve results is to improve the input image.
Source image checklist
Aim for:
- High resolution: more detail helps the model maintain structure.
- Clean subject separation: clear foreground vs background reduces “bleeding.”
- Good lighting: avoids weird shadow drift.
- Minimal motion ambiguity: avoid images where it’s unclear what should move.
- No tiny text: small labels and fine typography often distort over frames.
What tends to break image-to-video
- Busy patterns (tight stripes, complex grids)
- Small facial features (distant faces)
- Hands near faces (common distortion area)
- Jewelry, glasses, and teeth (can shimmer or warp)
- Brand marks and packaging text (may morph)
If your goal is a product clip, consider using a clean product photo with a simple background and strong edges.
The Core Skill: Writing Motion Prompts That Don’t Destroy the Image
Many AI image-to-video tools let you describe motion. Think of it like directing a micro-scene.
A strong motion prompt includes:
- Subject stability instruction (what must not change)
- Type of motion (what moves)
- Camera behavior (how the viewer moves)
- Mood/tempo (slow, smooth, cinematic)
- Constraints (no distortion, no flicker, keep face consistent)
Examples of good motion prompts
- “Slow cinematic push-in, subtle breeze moving hair and clothing, stable face, natural blinking, smooth motion, no warping.”
- “Product on table, gentle 20-degree orbit camera move, soft studio lighting, maintain logo shape, no text distortion, smooth parallax.”
- “City street at night, light rain falling, reflections shimmering on wet pavement, slight handheld camera sway, keep buildings stable.”
Motion prompts to avoid
- “Make it look cool and dynamic” (too vague)
- “Fast action, extreme zoom, dramatic transformation” (often causes melting)
- “Change outfit, change face, add new objects” (increases identity drift)
The more you ask for, the more likely the model will rewrite your image.
Camera Moves That Usually Look Best
If you want a clip that feels real and usable, start with “safe” motion.
Reliable camera moves
- Slow push-in (dolly-in): cinematic and stable
- Slow pull-back: reveals context, less distortion risk
- Gentle pan: works for wide scenes
- Small orbit (10–25 degrees): good for objects and landscapes
- Subtle handheld sway: adds life if kept minimal
Moves that often cause artifacts
- Fast spins and big orbits
- Sudden zooms
- Hard cuts generated inside a single clip
- Aggressive tilt-shifts that confuse depth
If you need something dramatic, generate multiple shorter clips and stitch the best parts together.
Best Settings: Length, FPS, Resolution, and Aspect Ratio
Most users get better results by optimizing for platform and stability.
Clip length
- 2–4 seconds: often the cleanest and most consistent
- 5–8 seconds: possible, but flicker risk rises
- 10+ seconds: harder to keep faces and fine details stable
A practical approach is to generate 3–5 short candidates and pick the best.
Frame rate (FPS)
Some tools output at lower FPS, which can look choppy. If you have options:
- Use a standard frame rate like 24 or 30 for smoother feel.
- If motion looks jittery, reduce motion intensity rather than forcing extreme FPS changes.
Resolution
- Start with the highest resolution your workflow can reliably handle.
- If outputs look unstable, sometimes generating at a slightly lower resolution can reduce artifacts, then you upscale later.
Aspect ratios
Choose based on usage:
- 16:9 for YouTube, websites, presentations
- 9:16 for short-form vertical platforms
- 1:1 for feeds and some ads
If your tool crops automatically, review framing carefully. Faces and products can get clipped.
A Simple Workflow That Produces Better Results
Here’s a repeatable process you can use for most projects.
Step 1: Prepare the image
- Upscale if needed
- Clean obvious noise or compression
- If the background is messy, simplify it
- Decide what must remain unchanged (brand marks, facial identity)
Step 2: Choose a single “hero motion”
Pick one main motion:
- Camera push-in, or
- Slight orbit, or
- Atmospheric motion (rain/smoke)
Avoid stacking multiple large motions at once.
Step 3: Generate multiple variations
Instead of trying to perfect one generation, run several variations:
- Slightly different motion prompts
- Slightly different camera instructions
- Different motion intensity settings (if available)
This increases your chance of getting one clean clip.
Step 4: Review for common issues
Watch for:
- Flicker in lighting
- Warping around eyes, mouth, hands
- Background “swimming”
- Unstable edges (hair, glasses, logos)
Step 5: Light post-editing
Even good outputs often need:
- Trimming the best 2–4 seconds
- Mild stabilization (if the clip wobbles)
- Color correction for consistency
- Adding music or voiceover (optional)
- Exporting to the right size and format
AI generation is rarely the full finish line. Treat it like a draft that becomes a final clip with simple edits.
Troubleshooting: Fix the Most Common Image-to-Video Problems
When an AI clip looks wrong, the fix is often straightforward.
Problem: Flicker (brightness changes frame to frame)
Try:
- Reduce motion strength
- Use simpler lighting in the prompt (“soft studio lighting, stable exposure”)
- Use a more stable source image (less harsh contrast)
- Generate shorter clips
Problem: Face distortion or “identity drift”
Try:
- Ask for subtle motion only (blink, small head tilt)
- Reduce camera movement
- Use a higher-quality face image (front-facing, well-lit)
- Add constraints: “keep facial features consistent, no facial warping”
Problem: Hands look warped
Hands are difficult for many models. Try:
- Avoid prompts that require hand motion
- Use framing where hands aren’t the focus
- Keep motion to camera-only (parallax) rather than body motion
Problem: Text/logos on products warp
Try:
- Keep the camera move gentle
- Reduce motion intensity
- Use angles that don’t force the model to invent unseen sides
- Consider masking or overlaying clean text in post (if appropriate for your use)
Problem: Background melts or swims
Try:
- Simpler backgrounds
- Less orbit/rotation
- Prompts that emphasize stability: “static background, stable architecture lines”
Problem: The video looks “AI-ish”
Try:
- Lower the motion amount
- Use natural camera language (slow, smooth, subtle)
- Avoid dramatic transformations
- Add realistic cues: “natural motion blur, cinematic, shallow depth of field” (only if it fits)
Quality and Ethics: Important Things to Get Right
Image-to-video is powerful, which means it can also be misused.
Respect consent and likeness
- Don’t animate a real person’s face into actions they didn’t do, especially for public or commercial use, unless you have clear permission.
- Be careful with minors and private individuals.
Avoid misleading content
In news, finance, health, or legal contexts, synthetic video can confuse viewers. If your content could be interpreted as real footage, consider clear labeling in your own publishing process and internal guidelines.
Use properly licensed images
If you don’t own the image or have permission to use it, turning it into a video doesn’t remove rights issues. Start with images you created, licensed, or have authorization to use.
Be careful with brand assets
Even if you own the brand, AI can distort logos and packaging in ways that look unprofessional. Review outputs closely.
Practical Ideas You Can Try Today
If you want quick wins, these concepts tend to work well.
For product shots
- “Slow orbit, soft studio lighting, clean background, keep product shape stable.”
- Use simple surfaces (tabletop) and avoid busy backgrounds.
For landscapes
- “Slow push-in, gentle parallax depth, moving clouds, stable horizon line.”
- Landscapes often handle parallax beautifully.
For portraits
- “Subtle breathing motion, natural blink, slight head movement, stable face, smooth cinematic look.”
- Keep it subtle to avoid uncanny results.
For illustrated art
- “Add subtle animated light rays, drifting particles, slow camera pan, keep line art stable.”
- Stylized content often tolerates generative motion better than realism.
Conclusion
AI image to video is one of the fastest ways to turn a single still into a scroll-stopping clip, but quality depends on direction and restraint. Start with a clean, high-quality image, choose one clear motion idea, and write prompts that emphasize stability. Generate several variations, pick the cleanest 2–4 seconds, and finish with light editing for a professional result. With a repeatable workflow and responsible use, image-to-video can become a reliable content tool for marketing, storytelling, and product visuals.
6. FAQs
What does ai image to video mean?
AI image to video means using AI to generate a short video clip from a still image by adding motion, camera movement, and frame-to-frame animation.
How can I make AI image-to-video results look more realistic?
Use a high-quality source image, keep motion subtle, choose gentle camera moves (slow push-in or small orbit), and add constraints like “stable face” and “no warping.”
Why do faces or hands distort in image-to-video clips?
Faces and hands are complex and can drift over time as the AI generates new frames. Reducing motion intensity, shortening clip length, and using clearer images often helps.
What’s the best length for ai image to video clips?
Many users get the most stable results in 2–4 seconds. Longer clips can work, but they’re more likely to introduce flicker or identity drift.
How do I stop logos or text from warping in AI-generated videos?
Keep camera motion gentle, reduce motion strength, use simpler angles, and avoid forcing the model to generate unseen sides of packaging. Always review closely before publishing.
Can I use ai image to video for commercial content?
Often yes, but you should ensure you have rights to the image and permission for any person’s likeness. Also review platform rules and keep your content non-misleading.
What should I export for social media: 16:9 or 9:16?
For most short-form platforms, 9:16 performs best. For websites and YouTube, 16:9 is usually the best choice. Many teams generate one master and export multiple aspect ratios.