
Finding mold indoors can be unsettling, especially when it appears after a leak, flood, or persistent musty smell. Mold Remediation is not simply scrubbing away...
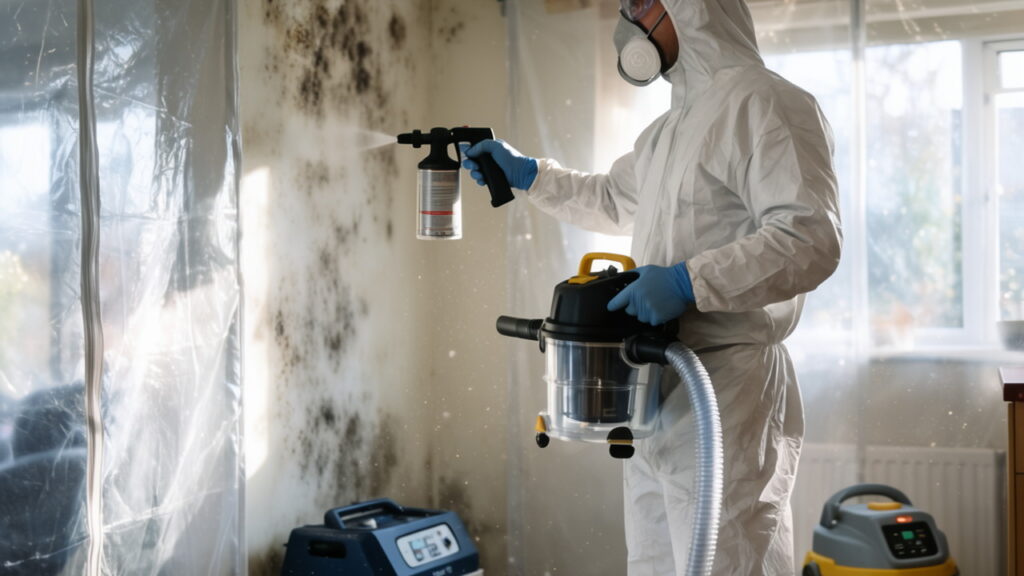
Finding mold indoors can be unsettling, especially when it appears after a leak, flood, or persistent musty smell. Mold Remediation is not simply scrubbing away a stain; it means addressing the moisture, safely cleaning or removing affected materials, and reducing the chance that growth will return.
This guide explains how Mold Remediation works, when to seek professional help, what to know about testing and costs, and how to prevent repeat problems. The advice is general and cannot replace an inspection, medical guidance, or local building requirements.
What Mold Remediation Actually Means
Mold remediation is the process of identifying and correcting moisture problems, containing affected areas when appropriate, and cleaning or removing mold-damaged materials. The goal is to bring the building back to a dry, usable condition, not to remove every mold spore from the indoor environment.
Mold spores are naturally present indoors and outdoors. Mold remediation focuses on controlling active growth and its cause, limiting the spread of dust and debris, and drying the affected area thoroughly. Simply killing visible mold without removing contamination or correcting moisture may leave the problem unresolved.
Mold Removal and Mold Remediation Are Not the Same
“Mold removal” can describe cleaning or removing visible growth. Mold remediation is broader: it also considers how moisture entered, whether contamination spread, which materials can be cleaned, and how to prevent a recurrence.
The distinction matters because mold can grow again if a leak or damp condition remains. A complete mold remediation plan addresses both the affected material and the building conditions that allowed growth.
Why Moisture Control Is Essential
Mold needs moisture to grow. Common sources include plumbing leaks, roof damage, flooding, condensation, poorly vented bathrooms, and water entering through foundations or windows.
The U.S. Environmental Protection Agency advises fixing the water problem as part of cleanup. Mold remediation that leaves a leak, persistent condensation, or high indoor humidity untreated may provide only temporary improvement.
Signs Your Property May Need Mold Remediation
Visible spots or fuzzy growth on walls, ceilings, wood, carpet, or stored items are common signs of a moisture problem. Color alone cannot identify the mold species or determine its health risk; growth may appear in different colors, and some stains that resemble mold have other causes.
A persistent musty odor can indicate dampness or concealed growth, but smell alone cannot confirm its location or extent. If the odor continues after obvious surface dirt is cleaned, Mold Remediation may require a closer inspection of areas such as wall cavities, flooring, or spaces around plumbing.
Look for Water Damage and Condensation
Peeling paint, bubbling drywall, warped trim, discolored ceiling patches, and swollen flooring can point to moisture intrusion. Condensation on windows or pipes may indicate humidity or ventilation concerns, particularly when it happens repeatedly.
Mold remediation should not begin by covering suspicious staining with paint or sealant. First determine whether water is still entering or collecting in the material, because concealing a damp surface does not correct its cause.
Consider Hidden and Recurring Growth
Mold can develop behind cabinets, under flooring, inside wall cavities, or around air-conditioning components when moisture is present. Recurring growth in the same location is a reason to investigate the source rather than repeatedly wiping the surface.
If growth appears near an HVAC system, after sewage contamination, or across materials that may contain lead or asbestos, avoid disturbing the area. A qualified professional can help determine whether specialized assessment or controlled removal is needed.
Mold Remediation and Health Considerations
Exposure to damp or moldy indoor environments can cause symptoms such as nasal congestion, coughing, wheezing, eye irritation, or skin irritation in some people. Responses differ: one person may notice symptoms while another in the same building does not. Mold remediation is a building-cleanup task, not a medical diagnosis.
People with asthma, mold allergies, or weakened immune systems may need extra precautions. The CDC advises people with asthma, allergies, or immune suppression not to take part in mold cleanup. Anyone concerned about symptoms should consult a healthcare professional rather than relying on an online test or cleanup product.
Protect Occupants During Cleanup
Keep children, pets, and people who are sensitive to mold away from the work area. For a small, uncomplicated cleanup, use protective equipment appropriate to the task, such as gloves and eye protection; a suitable respirator may also be needed depending on the conditions.
Larger or more complicated Mold Remediation work may require containment and professional safety procedures. Do not enter areas with unsafe electrical conditions, unstable structures, extensive sewage contamination, or other hazards. If you are unsure whether the area is safe, stop and seek qualified help.
The Mold Remediation Process in 10 Practical Steps
The correct sequence depends on the size and location of the affected area, the material involved, and the water source. These steps provide a general overview, not a substitute for a site-specific assessment.
Step 1 Find the Moisture Source
Inspect for the source of water before cleaning. Check for leaking pipes, roof or window problems, drainage issues, condensation, and plumbing fixtures near the affected area.
A mold remediation project is unlikely to succeed if the source remains active. If the cause is unclear, a plumber, roofer, building professional, or other qualified specialist may be needed.
Step 2 Assess the Area and Its Risks
Estimate the visible area, identify affected materials, and consider whether growth may extend beyond what can be seen. Note any musty odor, recent flooding, previous repairs, or recurring dampness.
Mold remediation decisions should account for contamination type as well as size. Sewage, stormwater, HVAC involvement, concealed growth, and suspected hazardous building materials call for more caution than a small patch on a washable surface.
Step 3 Protect People and Prepare the Work Area
Plan how occupants will stay away from the work zone and how debris will be handled. Avoid moving contaminated materials through clean rooms, and do not point fans at visible growth because airflow can spread dust.
For larger projects, mold remediation professionals may use plastic barriers and controlled airflow to limit spread. The setup should match the job; elaborate containment is not necessary for every minor surface-cleaning task.
Step 4 Stop the Water and Correct the Cause
Repair the leak or other moisture source, and arrange professional repairs when needed. If water is entering from outside, address drainage, roof, window, or foundation issues rather than treating only the indoor stain.
Mold remediation should follow appropriate water control. If water damage is extensive, contaminated, or affects electrical systems or structural materials, contact qualified responders instead of attempting an unsafe repair.
Step 5 Use Containment When Appropriate
Containment can reduce the movement of mold-contaminated dust and debris into unaffected parts of a building. A professional may use barriers and HEPA-filtered equipment, with controlled or negative air pressure where the project requires it.
Not every small cleanup needs a full containment system. Mold remediation plans should be proportionate to the area, building layout, affected materials, and risk of spreading contamination.
Step 6 Remove Materials That Cannot Be Cleaned
Some porous items, such as moldy ceiling tiles, insulation, carpet padding, or sections of damaged drywall, may be difficult to clean thoroughly. Depending on their condition and the extent of growth, removal and disposal may be more appropriate than surface treatment.
Professionals should limit dust during removal and protect surrounding areas. A Mold Remediation contractor should explain which materials will be removed, why they cannot be cleaned, and how debris will be contained.
Step 7 Clean Suitable Surfaces Thoroughly
Hard, nonporous surfaces can often be cleaned with detergent and water, then dried completely. Follow product labels and safety instructions, and never mix bleach with ammonia or other cleaners.
The EPA does not recommend routine use of biocides, such as chlorine bleach, in mold cleanup. Mold remediation is not achieved merely by killing growth: contaminated material must be appropriately cleaned or removed, and moisture must be controlled.
Step 8 Dry the Area and Control Dust
Drying is essential after cleaning or material removal. EPA guidance recommends drying water-damaged materials and areas within 24 to 48 hours when possible to help prevent mold growth, although the right response depends on the circumstances.
Professionals may use dehumidifiers, air movers, or HEPA-filtered equipment as appropriate. Drying must not spread contaminants, and fans should not blow directly onto visible mold or uncovered debris.
Step 9 Check the Results
After work, confirm that the moisture source has been corrected, the area is dry, and visible contamination and debris have been removed. Mold remediation verification generally relies on a careful visual review and moisture assessment, not on a single universal lab result.
There is no federal standard that sets one acceptable indoor mold concentration for every building. If the job was extensive, complicated, or involved a dispute, an independent qualified assessor may help evaluate the outcome.
Step 10 Restore the Building and Prevent a Repeat
Replace removed materials only after the underlying area is dry and the repair plan is appropriate. New drywall, paint, or flooring should not be used to conceal an unresolved leak or damp cavity.
A successful Mold Remediation project ends with moisture prevention, not simply cosmetic restoration. Check repaired areas periodically, especially after heavy rain, plumbing work, or seasonal humidity changes.
When to Choose DIY Mold Remediation or Professional Help
A small area of surface growth on a nonporous material may be manageable for a person who can work safely and correct the moisture source. The EPA’s cleanup guidance uses about 10 square feet as a point at which readers should consult its more detailed remediation guidance. This is general guidance, not a legal cutoff or guarantee that every smaller job is safe to handle yourself.
Consider professional Mold Remediation when growth is extensive, hidden, recurring, linked to contaminated water, or near an HVAC system. Professional help is also prudent when the building has structural damage, the cause of moisture is uncertain, or occupants have health vulnerabilities.
How to Evaluate a Mold Remediation Contractor
Ask prospective contractors for a written scope that identifies the affected materials, containment approach, removal methods, cleanup, drying, and moisture repairs. Request proof of relevant insurance, references, and details about training or qualifications, and check licensing requirements in your state or locality.
There is no single mold-remediation credential that applies universally across the United States, and legal requirements vary by jurisdiction. The ANSI/IICRC S520 standard is a recognized industry reference for professional Mold Remediation, but a standard or certificate is not itself a guarantee of quality. Get clear answers before work begins.
Be wary of promises to sterilize an entire home, eliminate every spore, or guarantee a health outcome. A credible contractor should explain the limits of the work, how the moisture source will be handled, and whether an independent assessment is appropriate for a complex project.
Mold Remediation Testing and Verification
When visible mold is present, testing is often not necessary to decide that moisture and contamination need attention. The EPA notes that there are no federal standards for mold or mold spores in indoor air, so a single air-sample result cannot establish a universal pass or fail.
Testing may be useful when a qualified professional has a clear question to answer, such as investigating a suspected hidden source or evaluating a complex building concern. Mold Remediation decisions should not rely on do-it-yourself test kits or a mold color chart to identify a species or determine health risk.
If sampling is proposed, ask who will collect it, what question the test is intended to answer, how results will be interpreted, and what actions might follow. A laboratory number without context may add confusion rather than clarify the Mold Remediation plan.
Mold Remediation Costs and Insurance
There is no single reliable price for Mold Remediation because costs depend on the affected area, materials, access, water source, containment needs, and repair work. A small, accessible cleanup differs from removing mold-damaged materials inside a wall or addressing widespread flooding.
Request itemized written estimates describing inspection, containment, removal, cleaning, drying, disposal, and reconstruction as separate tasks where possible. Compare the proposed scope, not only the total price, and ask what happens if concealed damage is discovered.
Insurance coverage depends on the policy, the cause of water damage, and the circumstances. Sudden accidental leaks may be treated differently from long-term seepage or flooding, and mold-related coverage can be limited or excluded. Contact your insurer promptly, document damage with photographs, and review the policy; do not assume Mold Remediation costs will automatically be covered.
Preventing Future Mold Remediation
Prevention begins with controlling indoor moisture. Repair leaks promptly, use bathroom and kitchen exhaust fans that vent appropriately, and address water intrusion around windows, roofs, basements, and foundations.
EPA guidance recommends keeping indoor relative humidity below 60 percent, ideally between 30 and 50 percent when practical. A hygrometer can help monitor humidity, while a dehumidifier may be useful in persistently damp rooms. Ventilation and humidity control support Mold Remediation prevention but do not replace repairs to a leak.
Dry wet materials quickly, ideally within 24 to 48 hours when possible, and investigate recurring condensation. Keep gutters and drainage systems maintained, avoid storing damp items in closed spaces, and periodically check vulnerable areas such as under sinks, around appliances, and in basements.
Common Mold Remediation Mistakes to Avoid
Some quick fixes hide rather than resolve the problem. Painting or caulking over mold, cleaning without correcting a leak, or replacing damaged finishes before a cavity is dry can allow growth to return.
Other mistakes include relying on bleach as the sole solution, disturbing large areas without protection, or using a fan that spreads dust into clean rooms. Mold Remediation requires careful material handling and moisture correction, not simply a stronger chemical or more aggressive scrubbing.
Do not assume that dark mold is automatically more dangerous than light-colored growth, or that a home test can tell you whether a space is safe. Avoid mixing cleaning products, and never disturb suspected asbestos-containing or lead-based materials without proper assessment.
FAQ’s
What is Mold Remediation?
Mold remediation addresses the moisture source, cleans or removes affected materials, and reduces the chance of growth returning. It does not mean eliminating every naturally occurring mold spore.
Can I do Mold Remediation myself?
A small, uncomplicated area may be manageable if you can work safely and fix the moisture source. Get professional help for extensive, hidden, sewage-related, HVAC-related, or recurring mold.
Does mold color show whether it is dangerous?
No. Color alone cannot identify a mold species or determine its health risk. Focus on moisture control and appropriate cleanup rather than trying to classify mold by appearance.
Do I need mold testing before Mold Remediation?
Usually not when visible mold and a moisture problem are already present. Testing has no universal federal indoor-air threshold and should be done only when a qualified professional has a clear purpose.
Will homeowners insurance cover Mold Remediation?
Coverage depends on the policy and the cause of the moisture. Contact your insurer, document the damage, and check policy terms rather than assuming remediation is covered.
How can I prevent mold from returning after Mold Remediation?
Repair leaks, dry wet materials promptly, control indoor humidity, and improve ventilation where needed. Check repaired areas again if odors, water stains, or dampness return.
Conclusion
Mold Remediation works best when it combines safe cleanup with a lasting solution to the moisture problem. Identifying warning signs, protecting occupants, removing or cleaning affected materials, and confirming that the area is dry all contribute to a more complete result.
For extensive or complicated contamination, consult qualified local professionals and ask for a clear written scope. Ongoing leak repairs, humidity control, and prompt drying help lower the chance of needing Mold Remediation again.